Wakandi allows you to set up more than one share product
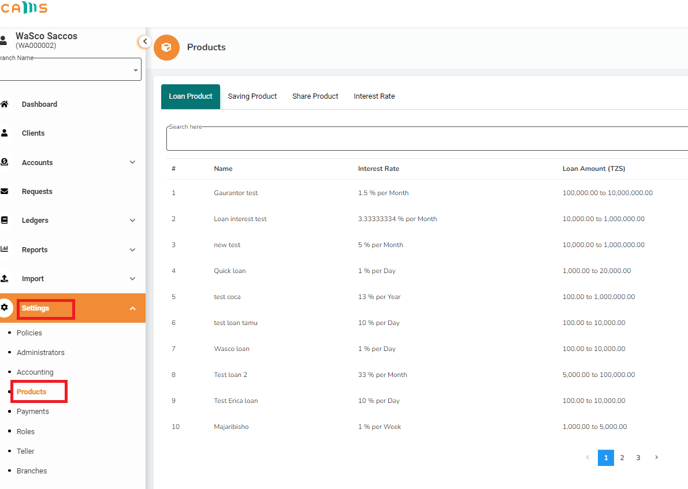
Go to Settings. Select Products.
Step-by-step guide to configuring Share product
- Login to the Wakandi Admin App.
- Go to Settings.
- From the dropdown menu select Products.
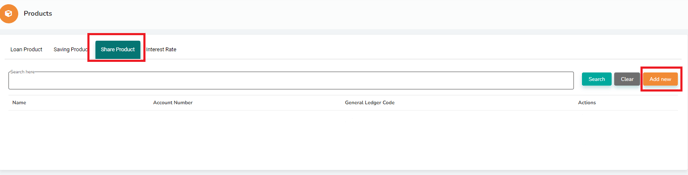
- Select Share product from the top menu bar.
- Click Add New on the top right.
- From here, you can fill out the share product details whether it is Voluntary or Compulsory. You can even customize the name to match your Saccos Policy.
- You can also set to allow the Share product to be used as collateral for a loan by checking Allow as guarantor and Allow as.
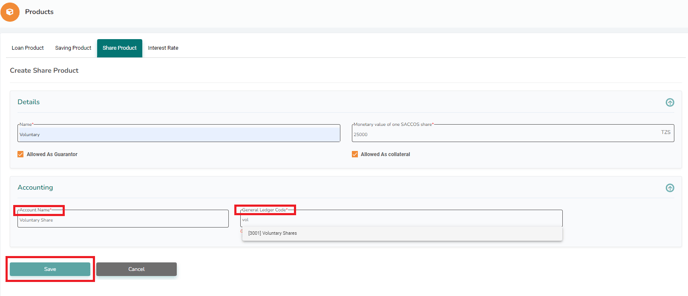
- Fill in the Account name and Select the respective share ledger on the general ledger code.
- Click Save to complete the Share product set-up.