Step two is adding the member's loans, savings and shares.
With the role of Accountant, go to Member Financial Data and click on Pending and Add - to add members' financial data.
Step-by-step guide
If you want to add a member's financial data, do the following steps:
- Log in to the Wakandi Admin App as an Accountant.
- Open the Member Financial Data menu.
- Click on the Add button.
- Start by filling in details about the member:
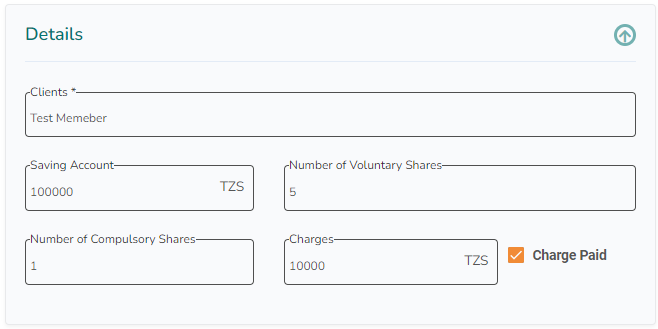
- In the Client field, you will find the member you added in step 1.
- If the member has a balance on the mandatory savings account, add this value in the Savings Account field.
- The number of shares is added in the Number of Voluntary Shares and Number of Compulsory Shared fields.
- If your Saccos has a member start fee, add this sum in the field Charges, and if the member has paid it, tick off in the box.
- Add all loans the member currently has, and fill in loan details:
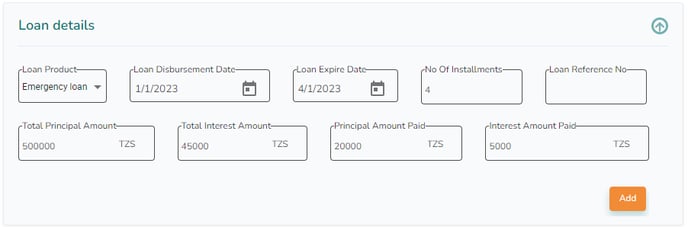
- Choose a Loan product.
- Set the correct Loan disbursement date and Loan Expire date.
- Set the number of Installments.
- If you have a loan reference number, you can add it in the Loan Reference No field.
- Add the total loan amount in the Total Principal Amount field.
- Add the calculated interest on the loan in the Total Interest Amount field.
- If the member has paid anything on the loan, add this amount in the Principal Amount Paid field.
- If the member has paid interest on the loan, add this amount to the Interest Amount Paid field.
- When all fields are correct, click the Add button.
- If you want to see the instalments for the loan, click on this button:

- Start by filling in details about the member:
-
-
- If you want to delete the loan you added, click on this button:

- If a member has more loans, start filling in the information for the following loan, and an Add button will appear.

- If you want to delete the loan you added, click on this button:
- If a member has any voluntary contributions, you need to add them under Contribution details:
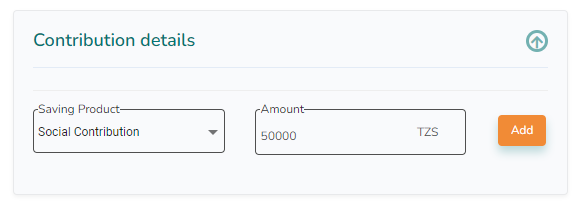
- Choose a Saving product.
- Add the amount the member has in his balance on this saving product.
- Click Add
- Repeat adding savings products until all members' savings products and balances are added.
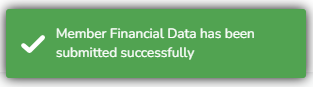
- Click Save, and you will get a confirmation in the right corner that the member's data has been submitted successfully:
If this member has already submitted, you will get this message: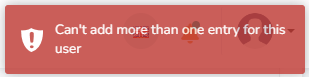
-
-
-